Fabric mask pattern
2020.07.05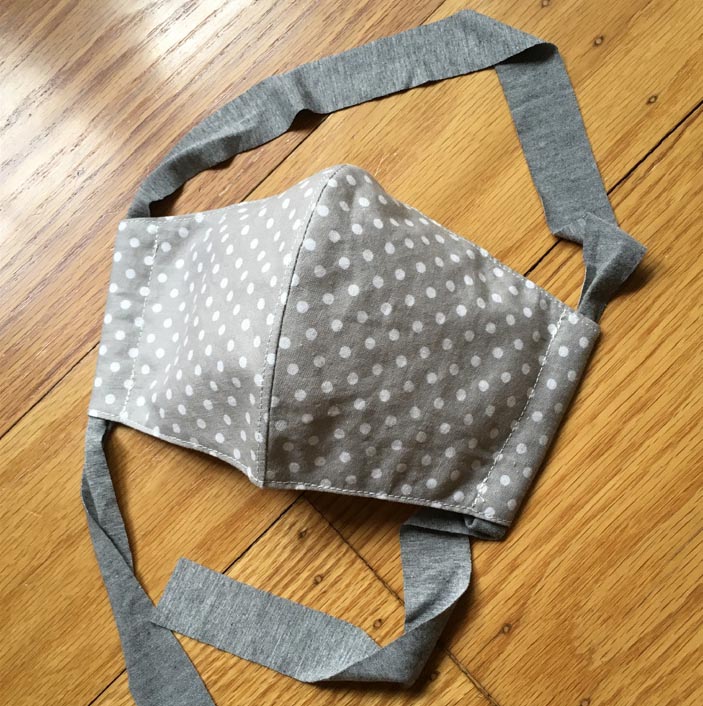
When the idea of wearing masks began floating around in March and April earlier this year, I started experimenting with sewing different online mask patterns. My ultimate goal was to find or draft a pattern using quilting cotton that could fit a variety of faces.
I combined two online patterns for fitted face masks to create a pattern that would work for a range of adult faces. Here is the pattern with instructions, digitized by Wendy Nishizaki:
Lauren’s Mask: Directions and Pattern
The goal
Create a mask that is:
- comfortable to wear: it can be worn for long periods of time and doesn’t feel too hot against the face
- close-fitting and prevents air escaping around the nose: this is especially important if you wear glasses like I do, since exhaling in a mask usually causes glasses to fog up
- easy to take on and off
- fits a variety of face shapes and nose sizes
The initial candidates
I started by sewing three different online patterns:
Basic surgical mask with 3 pleats
Source: WeNeedMasks.org
This style of mask calls for using either elastic (which has lately been in short supply) or non-stretchy fabric ties (which I made from quilter’s cotton with a bias tape maker and an iron) to hold the mask against the face. I found that this style of mask uses a lot of material and it doesn’t fit very close to the face. Without a nose wire, I found that on my face it left large open gaps on either side of my nose bridge while simultaneously squashing the tip of my nose. Additionally, the non-stretchy fabric ties were difficult to adjust and untie.
Olson mask
Source: UnityPoint Health (or from here or here)
After sewing this mask, I found that the top of the mask cheeks weren’t sloped enough; as a result, the mask sat too close to my eyes and kept touching the bottom of my glasses. I also found that there seemed to be lots of unnecessary fabric layers at the cheeks. The large amount of fabric was due to the sides of the mask being cut quite long – this allows the same pattern to be adopted to fit heads of dramatically different sizes by folding the sides over different amounts. The raw edges of the lining and external panels are completely finished before the sides of the mask get folded over to make side channels for straps; as a result, at least 4 layers of quilting cotton sit against the cheeks, making the whole contraption feel too warm and heavy.
Compared to the basic surgical mask style, I liked that this mask conformed to the shape of my nose and cheeks. I also really liked that it contained a nose wire. By experimenting with different wire shapes, I was able to seal up the gap on either side of my nose, which dramatically decreased the amount of hot air escaping near my eyes and fogging up my glasses.
Craft Passion mask
Source: Craft Passion
I created the Type A/C mask (A: normal mask, sans filter pocket; C: channel for a removable nose wire). I found that the women’s pattern fit my face well but was (surprise surprise) too small to fit my male partner’s face – it didn’t extend far enough past his chin. In general, I think this mask works poorly for faces with larger or pointier noses; because the top center of the mask angles steeply upwards, the gap on either side of a more prominent nose can be too large to close with a nose wire.
Overall, I liked that this mask contained less material than the Olson Mask; it felt significantly less heavy and constrictive and kept my face cooler.
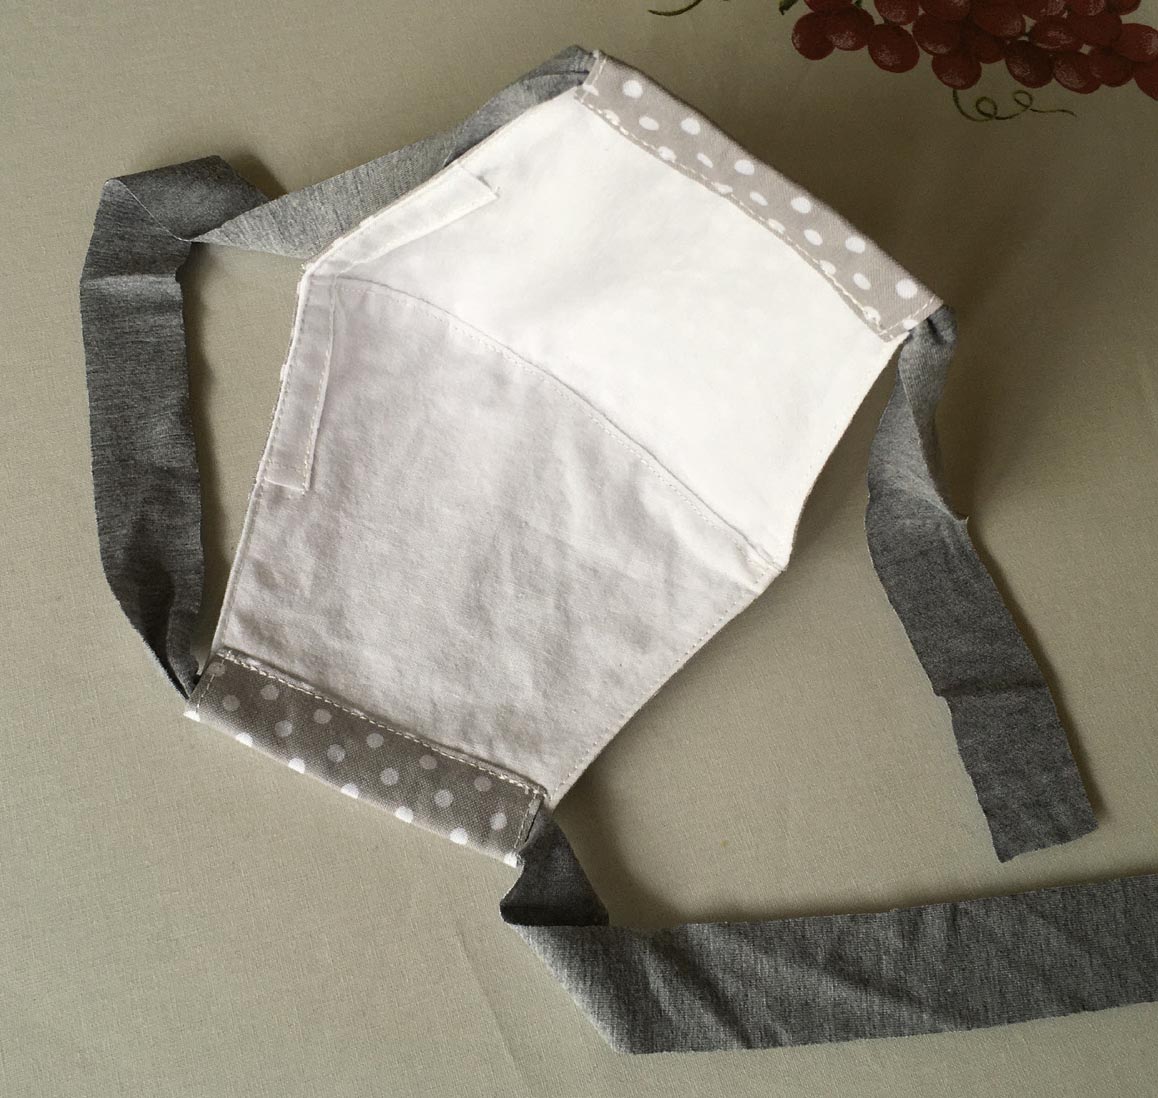
The final mask
I combined the Olson mask and Craft Passion patterns to create my own pattern. The new mask follows the same nose shape as the Olson mask, but the angle of the cheeks and extent of the side panels match that of the Craft Passion women’s pattern. I adapted the nose wire channel fabric from the Craft Passion pattern to use less fabric, and the overall directions are similar to those for the Craft Passion mask.
Many mask patterns out there call for two loops at the side of the mask, one to go around each ear. However, when I tried these patterns with loops, my mask would gradually slide down my face as I talked. I also found that my bendy ear cartilage released the mask loops over time, and a mask attached with ear loops would just fall off my face.
My solution was to attach the mask to my head using a single band of stretch jersey fabric that started at the top/back of the head, threaded through the mask sides, then tied at the base of the neck.
Here are the complete pattern and sewing directions: